15. Appendix.05:TPU Profile Tool Guidance
This chapter mainly introduces how to use Profile data and Tensor Computing Processor Profile tools to visualize the complete running process of the model to facilitate model performance analysis. Currently, Profile tools support BM1684, BM1684X, BM1688 and CV186X.
15.1. Compile Bmodel
TPU Profile is a tool for converting Profile data into visual web pages. First, generate bmodel. The following uses the yolov5s model in the tpu-mlir project to demonstrate.
Since Profile data will save some layer information during compilation into bmodel, causing the size of bmodel to increase, it is turned off by default. The way to open it is to call model_deploy with the --debug option. If this option is not turned on at compile time, some data will be missing when the data obtained by turning on Profile at runtime is visualized. The command to generate a bmodel within Docker is as follows:
# generate top mlir
$ model_transform \
    --model_name yolov5s \
    --model_def ../yolov5s.onnx \
    --input_shapes [[1,3,640,640]] \
    --mean 0.0,0.0,0.0 \
    --scale 0.0039216,0.0039216,0.0039216 \
    --keep_aspect_ratio \
    --pixel_format rgb \
    --output_names 350,498,646 \
    --test_input ../image/dog.jpg \
    --test_result yolov5s_top_outputs.npz \
    --mlir yolov5s.mlir
# convert top mlir to fp16 precision bmodel
$ model_deploy \
    --mlir yolov5s.mlir \
    --quantize F16 \
    --processor BM1684X \
    --test_input yolov5s_in_f32.npz \
    --test_reference yolov5s_top_outputs.npz \
    --model yolov5s_1684x_f16.bmodel \
    --debug
Through the above commands, yolov5s.onnx is compiled into yolov5s_bm1684x_f16.bmodel , and the --debug parameter will record the profile data.
15.2. Generate Raw Profile Data
Copy the generated yolov5s_bm1684x_f16.bmodel to the running environment with driver. In the same compilation process, the Profile function at runtime is turned off by default to prevent additional time consumption when saving and transmitting profiles. When you need to enable the profile function, set the environment variable BMRUNTIME_ENABLE_PROFILE=1 before running the compiled application. Then use the model testing tool bmrt_test provided in driver to run bmodel and generate profile data. Execute the following command outside of Docker:
export BMRUNTIME_ENABLE_PROFILE=1
bmrt_test --bmodel yolov5s_1684x_f16.bmodel
The following is the log output after opening Profile:
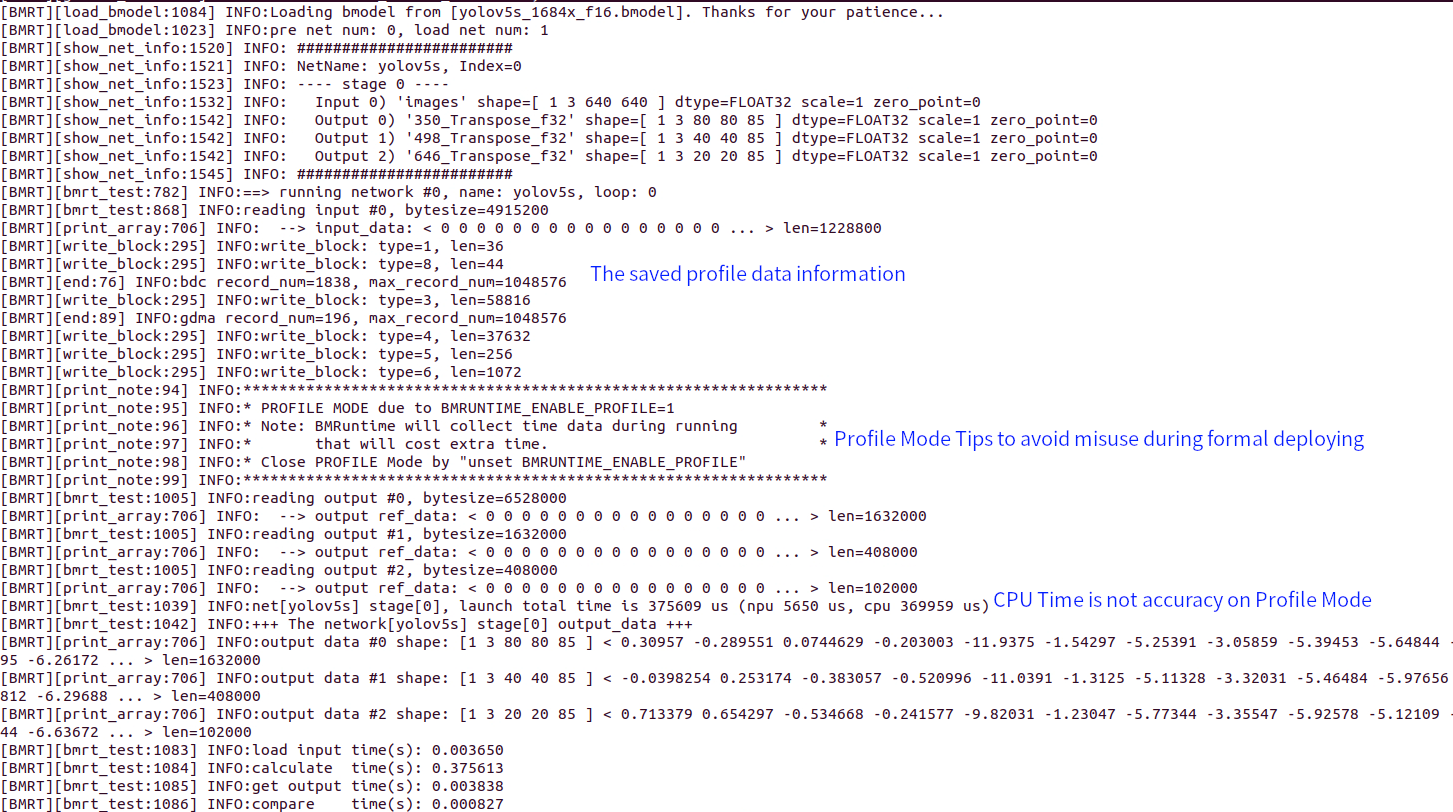
Fig. 15.1 The log output after opening Profile
After the run completes, the bmprofile_data-1 folder is generated in the current directory, which contains all Profile data.
15.3. Visualize Profile Data
Copy the bmprofile_data-1 directory back to the tpu-mlir project environment inside Docker. Tpu-mlir provides the tpu_profile script to convert the generated profile data into a web page file for visualization. Execute the following command inside Docker:
# Convert the original profile data in the bmprofile_data_0 directory into a web
# page and place it in the bmprofile_out directory
# If there is a graphical interface, the browser will be opened directly and the
# results will be seen directly.
tpu_profile bmprofile_data-1 bmprofile_out --arch BM1684X
ls bmprofile_out
# echarts.min.js  profile_data.js  result.html
For the BM1688 or CV186X models, if you want to integrate layer information in the profile, you need to copy tensor_location.json and final.mlir in the yolov5s_1684x_f16 directory (the same name as the bmodel) to the bmprofile_data-1 directory.
Open bmprofile_out/result.html with a browser to see the profile chart. In addition, there are other uses of this tool, which can be viewed through the command as follows:
tpu_profile --help
There is a more detailed explanation of the Profile in the development manual for your reference.